Sunday, August 12, 2012

The uses of toothpaste

THE AMAZING TOOTHPASTE 

-uses for the common item-

Other than brightening your pretty pearls and cleaning up your breath, did you know that toothpaste has a whole lot of other uses? This simple, everyday gooey white stuff is actually a good cleaner, as it has lots of baking soda, menthol, oxygen bubbles, and other cleaning agents.

What you need:

Toothpaste
.....and, well, toothpaste

Blemish calmer

Dab a tiny dot onto an (unpopped) blemish, and leave it for and hour or so. The menthol in toothpaste helps calm the redness, and as the toothpaste dries, it draws out any moisture that is in the blemish. After doing this, make sure to moisturize well.

Bug bite itcher stopper

Got a bug bite? Follow the steps above for clearing a blemish. The toothpaste will draw out the poison in the bite, that with the menthol will gently calm the irritation down. (Just a hint, simple clear tape also works great to draw out the poison in a bite, try putting a piece on a bite and leaving it for an hour or so, it will stop the itching and make the bite go away.)

Headlight clearer

Plastic headlights are nice because they don't shatter when hit, however, in time they yellow and get tiny scratches, making their light dim and visibility very low. Whitening toothpaste will buff out small scratches to create a slightly smoother service, while the baking soda and whitening formula will take the yellowing out of the plastic. This is so much more economic than using the expensive kits to clear the headlights.

Lip plumper

I actually found this one out by accident. Either mouthwash or toothpaste, spread over freshly moisturized lips, will act as a plumper. How? The menthol will slightly irritate the sensitive skin on the lips, making them a bit puffy. This is the same idea that store bought lip plumpers use.


Sun burn relief

A light to medium sunburn can make the skin feel feverish and hot. Spreading a thin layer of toothpaste then rinsing it gently off will cool down the burn, keeping it from being uncomfortable. 


Nail stain remover

Everyday use, and colorful nail polish can stain fingernails an unattractive yellow. Toothpaste, particularly  whitening toothpaste, will whiten, lightly polish, and clean the nails. This leaves them pretty, shiny, and even minty smelling. 

Take out spill oopsies

Spill a little something on yourself at dinner? Don't worry, a little toothpaste and water, scrubbed lightly, then washed normally will take care of any stains.

Cellphone screen cleaner

Before you get ridiculously excited that this will save your cracked screen, keep in mind that this works on small scratches and scuffs on the screen of a cellphone. Use an old toothbrush and gently scrub the screen (not too hard, mind you, you don't want to make the scratches worse). Wipe off with a lightly damp cloth and let dry.


Ring cleaner

Use an old toothbrush and toothpaste to scrub your favorite rings, then rinse. I love this trick, it made my ring so shiny it sparkled blue and silver. It works great to get the grim, gruck, and general grossness that comes with rings.


And that is that! I hope this helps you out a bit, and gets your brain rolling with new ideas. I hope you have a wondrous day!

As always, feel free to leave comments, suggestions, questions, pictures of your projects, or anything else you can think of!


As a disclaimer, non of these pictures are mine, I got them all from Google.

Labels: Uses for toothpaste, DIY lip plumper, how to clean a ring, how to clear a blemish, how to fix a scratched phone, how to remove yellow from nails, sunburn coolant, how to calm a sunburn, DIY headlight cleaner, how to remove yellow from headlights

Wednesday, June 27, 2012

Tape Exfoliater

TAPE EXFOLIATER

-tutorial-

There are millions of exfoliating recipes, some with salt, some with sugar, some with honey and some with oil.  Though I really do like and use many of these recipes, sometimes I don't want to get my face all sticky and crunchy, I just need a quick fix. So here is a tutorial on how to exfoliate without water. 

What you need

Packaging tape, each brand works differently, some stickier, some gooier. My favorite brand is frustration free EZ start, its a crystal clear tape that works really well.

What to do

Simply peel a piece off, tear it, stick it to your nose, lips, face, or anywhere that needs exfoliation, and peel off. There are two ways to do this, you can either rip the tape off really fast to get an extreme exfoliation, or more slowly to only get the top layer off. One word of caution, be very careful not to use this process more than twice a week, because it can break capillaries on the delicate skin of the nose and around the eyes. After exfoliating, always make sure to moisturize well, because when you take off skin you are also taking off essential oils. My favorite moisturizer is Neutrogena Healthy Skin Face Lotion spf 15. This is a great way to get smooth healthy skin. 

I hope you enjoy this simple tutorial, and have a wondrous day!

As always, feel free to leave comments, suggestions, questions, pictures of your projects, or anything else you can think of!

Tuesday, June 26, 2012

Why Does Black Look So Good?

WHY DOES BLACK LOOK SO GOOD?

-an explanation-

This is something that I have thought of for a while, why do people look so good in black, yet white is one of the least flattering colors? I finally realized the answer, and here it is.

Why does black look so good?

Black is a very flattering color. The reason for this is behind the science of the color. Light that we see is a rainbow, and the color of something is actually the color that is being bounced back off of the object instead of being absorbed by it. Something red absorbs all the colors of the rainbow but red, red is bounced back, and our eyes collect this color, and our brain reads the object as red. Black absorbs all the colors of the rainbow, it does not release any of the colors (this is also why black is such a hot color to wear in the sun). Because of this, it doesn't show shadow and light as much as many other colors. When black is worn as a color, it hides our natural contours of our body, and instead shows off the silhouette of the person.

Why is white such an unflattering color?

Though white is a beautiful color, it is a hard color to wear and look good in unless the wearer has a perfect body, or the dress is draped and folded in the right ways. White is all of the colors, it is the opposite of black because it reflects all of the rainbow colors. It is a very light color, so it shows every shadow and light spot, which highlights every bump and hollow on the wearer. This tends to show off a girl's problem areas perfectly, and causes white to not be the most flattering color. This is also true about any shiny or metallic cloth, as it reflects all light and literally highlights any bumps. The best way to wear white without it being unflattering is to find a dress, shirt, or skirt that is draped, folded, or pleated in such a way that it masks the problem areas.

I hope this description helps with any confusion, and have a wondrous day!

As always, feel free to leave comments, suggestions, questions, pictures of your projects, or anything else you can think of!

Tuesday, June 12, 2012

About Me


WHO AM I?

I was home schooled as a kid. I guess that automatically makes me weird. However, I am completely OK with it. I actually embrace it with open arms and a goofy laugh. As a home schooler, I was able to finish my school and not have any homework, which left me ridiculous amounts of time to be bored. I didn't grow up with TV, well, we had one, but we didn't get many stations, and that forced me to find ways to fill the time. When I wasn't playing pioneer with my rag dolls (I had normal dolls, but I liked to be more authentic) or watching my older brother build master pieces out of popsicle sticks and hot glue, I was making something. I would make beds for my stuffed puppies or hats for my bears, or open up a stuffed animal hospital, where I stitched their rips and tears, bandaged them up, and took care of them. When Littlest Pet Shop came to be popular, I had my dad build me a house that was nice and tall so I could have separate rooms for each set. Then I went about making every conceivable thing in miniature for them, from a car to a stove to a mail box. I did the same for my American Girl doll. Whenever I wanted something from the American Girl magazine, I would sit and pout for a while, then get up and make some sort of rickety version of it. I still have a box full of my little inventions for her stuffed away in storage.
The point I'm trying to get at here is that I have craft sunk into my skin, I have frugal ideas for just about everything ingrained into my head. I love to share my ideas, and decided it was about time to do something about that. So I did, and now I will slowly fill up this blog site until it is brimming full and the internet is begging me to get off.

About the Name

Bubble Joy comes from a few things. First of all, I'm obsessed with bubbles and will go chasing after them like I'm a three year old any day. I also adore anything that has to do with water (as a kid my dad called me a mermaid cause I would refuse to get out of the pool). I love that bubbles are clear until they hit the light, then they burst with every color of the rainbow, sliding, dripping and morphing across its surface. They are so delicate, yet they live every bit of their short life lifting in the breeze, showing the world its unique colors as well as it can. When I think of bubbles, I think of happiness, the kind that (wait for it) bubbles out from the deepest parts of us and spreads smiles everywhere. That is part of the reason for the "Joy" part of the name. The other, more obvious reason, is because my middle name is Joy. When I'm not griping about school or groaning about mornings, I like to think that I'm fun to be around. If not fun, I'm at least amusing. I tend to find the tiniest things overwhelmingly exciting, though sometimes I'm completely oblivious to the big things. 

So, Welcome

I hope you stick around for a while, I'd love to make a new friend. As you browse around my blog, feel free to leave comments, suggestions, questions, pictures of your projects, or anything else you can think of, I'd love to hear you and hear about your creativity.

The Oldies, but the Goodies

THE OLDIES, BUT THE GOODIES 

-some of my favorite drawings from times past-

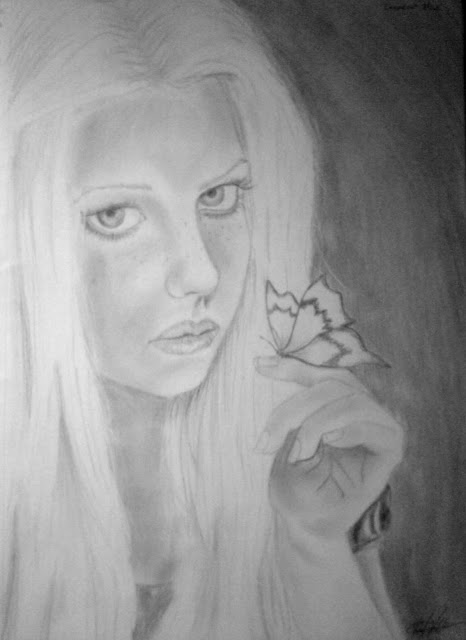
I absolutely adore looking through my old sketchbooks, laughing at my mistakes and admiring where I got it right. I believe it is a great way to avoid making the same mistakes in new drawings. I have so many drawings and sketches that I wish I could put up here, but there are so many the internet might just explode. So, I picked some of my favorites from certain eras of mine. These are from when I was first doing photo-realism. I found an artist that I adored and would spend hours painstakingly getting every detail she drew onto my paper. Sadly, I can't even remember the artist's name now, but I am thankful for her art, as it gave me a subject to try and draw. As you look as my sketches, let me be the first to apologize for the poor photo quality, my camera is not an expert on paper and pencil. Enjoy!  

This was my first drawing that I borrowed from the artist. Right now it is hanging in my bathroom.
I loved the artist's wispy sense of fantasy, so I strove to excel in that style. 


I had to change the setting to black and white so that this picture would turn out, but I lightly colored this girl's eyes blue. My friend saw it and said "It's so good I can see color in it!" Thanks so much for the compliment, but I wasn't THAT skilled!


I absolutely adore this picture, it had a touch of mystery wrapped in innocence. It took me about 3 times as long to knock this one out than it did for the others, but I somewhat got it to look like the original.
I did the finishing touches on this in history class when I was going to a classical school. Needless to say, my history teacher did not like me very much.

THE END (FOR NOW)


Thank you a million times for looking at my drawings from times past. I assure you that I will post more of my old favorites and new loves. As always, feel free to leave comments, suggestions, questions, pictures of your projects, or anything else you can think of!


Enjoy, and have a wondrous day! -Kelsey

Sunday, April 29, 2012

Cheese Cake Pudding

DELICIOUS CHEESE CAKE PUDDING

-recipe-

This is an absolutely, meltingly yummy pudding my mom made up. We had an excess amount of cottage cheese, so, instead of making a whole cheesecake, she changed the recipe and made pudding instead. I would like all credit to go to her.

What do you need?

3c. cottage cheese
3/4 c sugar
1 1/4 t. vanilla extract
1 t. almond extract
1 t. lemon zest (grated lemon peel)

What to do

Simply blend all the ingredients in a food processor until it is nice and smooth. If you don't have a food processor, you can use a blender, but use small amounts because this recipe can be very thick. Make sure you keep the pudding in the refrigerator, and you can eat this just as pudding, or use it as a dip or topping. I absolutely adore this recipe, it is amazingly delicious.  

Enjoy this recipe, and have a wondrous day!

As always, feel free to leave comments, suggestions, questions, pictures of your projects, or anything else you can think of!

Friday, April 13, 2012

Coffee Yogurt

DELICIOUS COFFEE YOGURT

-recipe-

This is a recipe I figured out almost on accident. It is an absolutely delicious treat that is actually not bad for you. I make it when I am having a sweet craving, and it gives me a bit of energy as well.

What do you need?

1/2 c any type of unsweetened plain or vanilla low fat yogurt. I used Fage (pronounce fa-yah) plain low fat Greek yogurt
1 tsp sugar
A smattering of your favorite coffee grounds. I used keurig coffee pods in french vanilla.


What to do


 Scoop out about a half a cup of yogurt into a bowl. You can do more or less depending on how much you want to eat.
 Add a teaspoon of sugar and mix in.
Sprinkle some coffee grounds into the yogurt. If you have regular coffee grounds, plain yogurt, and you want a French vanilla taste, simply add a few drops of vanilla flavoring.
Mix it all up, and eat! 


I find this to be delightfully yummy with just the right flavors mixed together. It can be tweaked to be your perfect flavor, adding or taking away sugar or coffee, and changing up the brands and types of ingredients. 

Enjoy this recipe, and have a wondrous day!

As always, feel free to leave comments, suggestions, questions, pictures of your projects, or anything else you can think of!

Thursday, April 12, 2012

Plastic Yarn

PLASTIC YARN 

-yarn made of grocery bags-

This is a tutorial on how to make yarn out of plastic grocery bags so that you can knit, crochet, or weave with it. 

What do you need?

Plastic grocery bags (how many and what color is up to you and the size of what your making)
Scissors 

How to do it

 First, flatten out and smooth down the bag. Then fold it in half twice, and cut off the handles and the sealed bottom
 Next, cut strips that are about half an inch wide.
Lastly, knot the strips together one at a time like the drawing shows. Loop the end of one strip through the end of the other. Pull that end through itself, and pull it tight. 
Be careful when you pull the knots tight, because if you pull too hard you can break the strip. If a strip does rip apart, simply do a square knot to make it a loop again.
Once you have a bag stripped and tied together, you can wrap it into a ball, or wrap it around something to keep it from getting tangled.


I hope you enjoyed this simple tutorial, and have a wondrous day!

As always, feel free to leave comments, suggestions, questions, pictures of your projects, or anything else you can think of!

The Bag of All Bags

THE BAG OF ALL BAGS

-the tutorial and pattern-


Go from this...
...To this!
...To this...
This tutorial is for a bag that changes from a beach bag to a stylish purse in seconds. The best part about this bag? it's made out of shopping bags! I crocheted about 50 bags to make this versatile purse/bag, and it is actually quite easy to do! It is made out of things you can most likely find around the house, and I made it and only spent about 10 cents!
The plastic bags are a lot softer when crocheted then they would seem to be. The plastic also makes it perfect for holding wet towels and swimsuits, and makes it easy to clean after a sandy day at the beach. Plus, this is a great way to reuse those plastic bags that we all seem to get at the stores!

What do I need?

-LOTS of plastic bags (at least 50, if not more), the color is completely dependent on what you want your bag to look like
-Scissors
-Three shoe strings, nice and long (I used some extra shoe laces that came with some of my shoes)
-Three beads that can fit two shoe strings snugly inside of them (you don't want them to be loose). I used beads that I had left over from crafts, but I was one short so I had to buy one, that's where my 10 cents went
-Six beads that can fit one shoe string, these can be a bit loose on the string
-Crochet needle (I used a size K, however, you can use a different size if you want the weave to be tighter or looser) 

Plastic Yarn

To find out how to make the bags turn into yarn, click this link.

Crocheting

I did not follow a pattern for this bag, but I will try and do my best to explain how I crocheted it. Keep in mind that I was using the double stitch for the entire bag except for parts on the strap and unless I was using the chain stitch. After connecting, I chain 2 to reach the double stitch height, then double stitch in the same hole I connected to.  
Start with a slip knot on your needle
Chain 6, connect (con) so you make a loop
1. Chain 2, double stitch (ds) 9, con
2. Chain 2, Increase (inc) every stitch, con
3. Chain 2, [inc 1, single 1] (These brackets [] meant to continue this pattern all the way around), con
4. Chain 2, [inc 1, single 1], con
5. Chain 2, [inc 1, single 2], con
6. Chain 2, [inc 1, single 3], con
7. Chain 2, [inc 1, single 5], con
8. Chain 2, [inc 1, single 10], con
9. Chain 2, [inc 1, single 22], con
If you are following my exact pattern, I switched to brown bags at row 10
10. Chain 2, [inc 1, single 10], con
11. Chain 2, [inc 1, single 20], con
12. Chain 2, [inc 1, single 20], con
Switch back to white
13. Chain 2, [inc 1, single 20], con
14. Chain 2, [inc 1, single 20], con
15. Chain 2, [single], con
16. Chain 2, [single], con
17. Chain 2, [single], con
Switch back to brown for 3 rows, then back to white for 5 rows. I did not increase any more stitches after row 14.
You can make this bag as tall as you like (think beach bag for height), but if you are following me exactly I did 52 rows altogether. There were 6 sections of brown and 6 sections of white (counting the bottom circle, but not counting the strap).

Here is the pattern for the strap.
1. Single stitch (ss) 1, double stitch (ds) 23, ss 1
2. Chain 1, skip, ss 1, ds 19, skip, ss 1
3. Chain 1, skip, ss 1, ds 19, skip, ss 1
Continue this pattern until row 9
9. Chain 2, skip, ds 10
10. Chain 2, ds 10
11. Chain 2, ds 10
Continue this until you are halfway to the length you want your strap to be, then repeat the pattern, starting on the opposite side from the first time you did it. When you get the length you want, connect the straps by single stitching them together.

The Shoe Laces

Now onto the drawstring and the converter strings. The drawstring is simple enough, just weave one string all the way around the top of the bag. Then, slide the big bead onto both strings, the little beads onto each string, and tie a knot at the ends.
This is the front and top views of
the drawstring in the bag
Beads on the
Shoe lace


If you only want a beach bag, you can stop now. You're done! However, if you would like to have the beach bag be able to convert to a purse, continue on.


Converter Strings

These are a bit more complicated, so I'm going to have drawings to try and help it be as easy as possible. First, decide how big you want your bag. Once you have figured this out, continue on.

In this drawing, the shoe string is the red line, and the green line is where the shoe string loops into the bag. The black circle is the actual bottom of the bag, and the blue line is where you want your purse to end. 
Here is an upright picture. The dotted lines are on the strings on the other side of the bag.


Bottom of bag
Repeat on the other side with the second shoe string. Make sure that you loop through where the gold circle is so that the two sides are crisscrossing.
Side view of bag


Finally, do the same process as you did with the drawstring to add the big and little beads to the ends of both shoe strings.


Making the Bag Work

Bottom of bag
To change the beach bag to a purse, tuck the bottom of the bag inside the purse, and pull the ends of both shoe laces until the sides are touching. Slide the big beads up to keep it tight.
HINT: I found that the dangling drawstrings were really annoying, so I tied them all together in a bow (see the purse picture).


Whew! After all of that work, you have a bag that is almost 100% recycled, and (unless you had to buy some of the supplies) 100% free. The plastic bags are really strong, and I use this purse all the time. I hope you enjoy this tutorial and have a wondrous day!

As always, feel free to leave comments, suggestions, questions, pictures of your projects, or anything else you can think of!

String for the Birds

STRING FOR THE BIRDS

-Tutorial-

Today is a warm, spring day, lightly breezy with just a touch of crispness to the air. This is a day that the robins and the blue jays will be poking their beaks around trying to find material for their nests. So, I thought I would help them out.
What do you need?
Lots of colorful scraps of fabric, string or yarn

 I had this ball of string left over from my Rag Doll hair look, because when I stripped the cloth, lots of little strings were left over.
What do you do?
Simply pull apart your string, or cut your scraps of cloth into reasonable sizes (think about a bird having to carry it).
 Next, go outside and spread them around. I put mine in a tree in my back yard, because I didn't want the strings to jam up the mower if they were in the grass.
 As you can see, it was a bit breezy, but hopefully the motion and colors will catch a bird's eye.
  The last step is to walk away and let the birds come and use your scraps as their new furnishings!


I hope you enjoyed this, and have a wondrous day!

As always, feel free to leave comments, suggestions, questions, pictures of your projects, or anything else you can think of!

Saturday, March 10, 2012

Rag Doll

RAG DOLL HAIR 

-story and tutorial-


I tend to be very adventurous with my hair, and this is probably the wildest thing I've done with it. I've always thought dreads looked so cool, but I could never bring myself to get them because they get so dirty. A couple of weeks ago, I had a scarf tied around my head, and the ends of the scarf trailing down on my shoulders, and an idea got sparked. I know that it is common to braid hair and braid hair extensions in, and I decided to try braiding in pieces of cloth instead.
So, I headed to my nearest Walmart store and picked up 3 and a half yards of solid colored cotton cloth (about a foot each of nine colors). If you are trying this, I suggest 2.5-3 yards total cloth, I had too much cloth. I then cut little slits about 0.5 inches apart, and ripped the strips apart.


This is my hair in the pony tail, much better!


This didn't look exactly as I was hoping, but it looked much better in a pony tail. Since my hair is very short, it was quite a relief to be able to pull my hair back again.
This is the process I went through to get the cloth braided into my hair. The hardest part about it was getting the knot and the initial part of the braid tight to my scalp, from then on it was just a simple braid. When I got to the end of my own hair, I continued braiding just the cloth. At the end, I did an end knot with the double cloth strand.

This was about halfway through

Front view

Top view. I tied the braids across the top
to add a bit of volume and cover the top knots.

Again, the back of it. This was before I
unbraided it, it looked so much better once it
was part-undone


After having this in a week, I decided to take it out, and that's when I found out how to make it look even better. I unbraided one of my braids up to my own hair, then realized that the strands of cloth were tightly waved. So, I unbraided and re-tied the rest of my braids, stopping when I got the part where my hair was braided in.
This is just a small section of my hair after I
partially unbraided it. It looked so much better!
It made my head look much more volumized and pretty. If you try doing this, I suggest braiding it all the way down, spritzing water, then blow-drying it and sleeping on it. In the morning, take it out until you reach the end of your hair (if it's short) or about 3-4 inches from your scalp, then tie it off again. This should give you a curly, bouncy colorful head of cloth hair.

This is just another hair-raising adventure of mine! I hope you enjoy this, and have a wondrous day!


P.S. Do you have a lot of string and scraps of cloth left over from stripping the cloth? See what to do with them in my blog post String for the Birds!


As always, feel free to leave comments, suggestions, questions, pictures of your projects, or anything else you can think of!